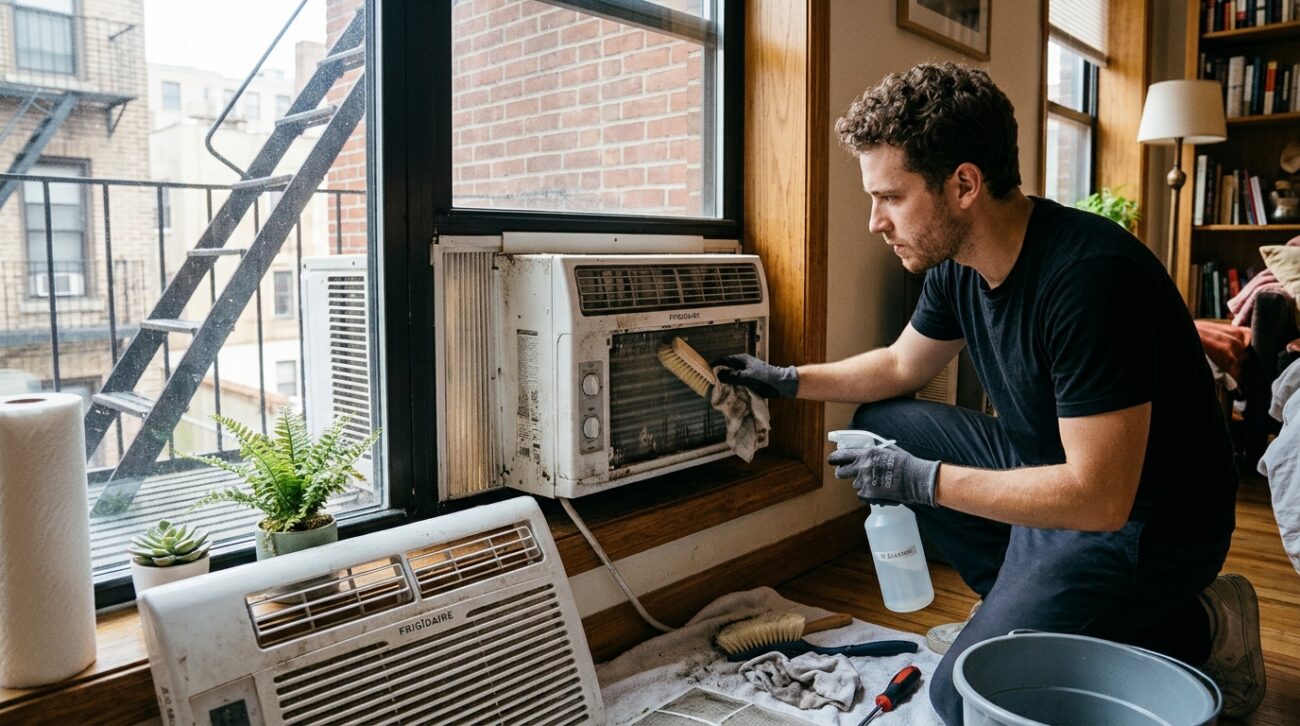
The first hot week of the year in New York has a ritual. Someone hauls the air conditioner out of the closet, or pulls the cover off the one that spent the winter in the window, wedges it into place, and plugs it in. Then the room fills with a smell that wasn’t there in September. Dusty, a little musty, sometimes faintly sour. Most people open a window and hope it burns off.
It might. It might also be a small mold colony in the drain pan, blowing spores into the one room where you sleep.
A window AC is one of the most neglected machines in a New York apartment. It’s easy to forget, hard to reach, and out of sight for half the year. It’s also the one appliance that moves large amounts of air through your living space, which makes its condition matter more than most.
This guide covers what actually builds up inside, how to clean it step by step without hurting the unit, the installation detail that prevents most mold problems, how through-the-wall units differ, and when to stop and get help.
What builds up inside a window AC
A window unit does two jobs. It pulls warm room air across cold coils, which cools it, and it blows that air back into the room. It also removes moisture, which collects as water in a pan at the bottom and drains outside. Every part of that process gathers something.
The filter is the first stop. It catches dust, pet hair, lint, and the fine grit that drifts in from city streets, and over a season it turns into a gray felt mat. A clogged filter restricts airflow, so the unit works harder to cool the room. The U.S. Department of Energy notes that replacing a dirty, clogged filter with a clean one can lower an air conditioner’s energy use by 5 to 15 percent. In an apartment where the electric bill spikes every July, that’s worth ten minutes.
The evaporator coils are the cold fins behind the filter. They stay cool and slightly damp when the unit runs, which is why dust that gets past the filter sticks to them, and why mold can grow on them. Dirty coils cool less efficiently and add to the musty smell.
The drain pan sits underneath and collects condensate. In a unit that’s installed correctly, most of that water drains outside, but pans still hold some moisture. If water sits, especially in warm weather, it grows biofilm and mold.
The condenser coils and the back of the unit face outdoors. They collect soot, pollen, and whatever else blows by. They don’t affect your indoor air much, but they affect how well the unit works.
The cabinet and the sleeve around it hide dust, insects, and occasionally evidence of mice or roaches that found a quiet, dark cavity over the winter.
Before you start: safety
Window ACs are heavy, electrical, and installed at windows. A few precautions matter.
- Unplug the unit and wait at least ten minutes before opening anything. Capacitors can hold a charge after the power is off.
- Get help lifting it if you need to remove the unit. A typical window AC weighs 40 to 70 pounds, and dropping one from a high floor is a real danger to people below.
- Don’t lean out of a window above the first floor to reach the back of a unit. If you can’t clean it from the inside, don’t clean it from outside.
- Keep water off the electronics. The control panel and motor are not waterproof, so no soaking, spraying directly, or pressure washing.
- Don’t open sealed parts. The refrigerant system is not a DIY job. Everything in this guide is on the accessible side of the unit.
Step by step: cleaning a window AC
Set aside about 45 minutes, plus drying time. You’ll need a vacuum with a soft brush attachment, a soft brush or old toothbrush, dish soap, white vinegar, a spray bottle, microfiber cloths, towels, and a fin comb if the coils are bent.
1. Take the unit out, or pull the front panel
If the unit has been in the window all winter, you can often clean it in place by removing the front grille. If it’s out of the window, put it on a towel in a spot where drips won’t matter, such as the bathtub or a balcony.
2. Wash the filter
Slide the filter out. Vacuum off the loose surface dust first. Then wash it in warm water with a little dish soap, rinse it, and let it dry completely before putting it back. A damp filter creates the perfect conditions for mold. If the filter smells musty, soak it for 15 minutes in a mix of one part white vinegar to three parts water, then rinse.
Check the filter’s condition too. If the mesh is torn, warped, or crumbling, replace it. Most filters are inexpensive and available online or at hardware stores.
3. Vacuum the coils
With the soft brush attachment, vacuum the evaporator coils (the fins behind where the filter was). Move in the direction of the fins, not across them, and go gently, because they’re thin aluminum and bend easily. If you see bent fins, a fin comb straightens them. Vacuum the condenser coils at the back too, if you can reach them.
4. Clean the drain pan
This is the step most people skip, and it’s where mold hides. Look at the bottom of the unit, where water collects. Mix equal parts white vinegar and water in a spray bottle, spray the pan and any visible growth, let it sit for five minutes, and wipe. For stubborn spots, a cloth dampened with 3 percent hydrogen peroxide works, applied with a cloth rather than sprayed. Don’t mix peroxide and vinegar in the same bottle. They form a corrosive acid when combined.
Check the drain holes along the base. A toothpick or thin brush clears dust and debris. A blocked drain is how a pan overflows.
5. Wipe the exterior and louvers
A damp microfiber cloth handles the cabinet and the front grille. The adjustable louvers collect dust in their slots, so run a cloth or a brush along each one.
6. Dry everything
Let the parts air dry fully before reassembling and plugging in. A fan speeds this up. If the unit was visibly wet inside, give it a couple of hours.
What not to use
- Bleach. It can corrode aluminum fins and metal parts over time, and the fumes in a small apartment are unpleasant.
- A pressure washer or steam cleaner. They force water into the electronics and bend the fins.
- Heavy fragrance sprays. They mask the smell without fixing the cause.
- Compressed air blasted straight at the coils, which can drive dust deeper into the fins instead of out.
The installation detail that prevents most mold
Cleaning solves the symptoms. Installation fixes the cause.
A window AC is designed to drain condensate outward. Most manufacturers call for the unit to sit with a slight downward slope toward the outside, typically a quarter inch or so, so water runs out the back instead of pooling in the pan. In a lot of New York apartments, that doesn’t happen. Pre-war windows have sills that sag, tilt inward, or aren’t level. Units get wedged in at odd angles. Add a tight sleeve, a pile of foam weatherstripping, and a few years in the same spot, and the unit sits flat or even tilted slightly backward into the room.
A quick check:
- Put a small level on top of the unit once it’s installed.
- The back should be slightly lower than the front, not higher.
- If it isn’t, adjust with a shim or a small wedge under the front of the unit, following your manufacturer’s instructions. Never prop an AC in a way that makes it unstable.
- Check the manual or the manufacturer’s website for the exact tilt, since it varies by model.
Also look at the seal around the unit. The foam or accordion panels on the sides wear out and compress, leaving gaps that let in hot air, noise, and bugs. Replacing the foam weatherstripping costs very little and makes a noticeable difference in how well the room cools. Make sure you’re not blocking the small drain holes in the base with insulation or caulk.
Many buildings have rules about how window units must be installed and secured, including brackets and support. If you rent, check your lease or ask your super before changing anything.
Reading the smell
The smell of your AC on startup is a diagnostic.
- Dusty for the first few minutes: dust on the coils and in the cabinet getting blown out. It should clear quickly. If it doesn’t, the unit needs the clean described above.
- Musty or like wet laundry: moisture and mold, usually in the filter, pan, or coils. Clean them thoroughly and check the tilt.
- Sour or like dirty socks: bacterial biofilm on wet coils or in the pan. Vinegar and a good scrub help.
- Sharp chemical or electrical smell: stop the unit. That could be a failing component. Unplug it and have it checked.
- Sewage: not the AC. Check the drains. (Our guide to mold and mildew in NYC apartments helps tell the sources apart.)
If you clean the unit and the smell comes right back, the mold may be deeper in the coils or the drain system than you can reach.
What to look for: signs it’s more than a cleaning job
Some findings mean stop and call someone.
- Heavy, widespread mold on the coils, inside the casing, or on the blower wheel
- A strong musty smell that persists after you’ve cleaned everything you can reach
- Water leaking into the room, not out of the back
- Evidence of rodents or roaches inside the unit, such as droppings, chewed material, or nests. Our guide on keeping roaches and mice out of your NYC apartment covers the next steps.
- Ice forming on the coils, which usually points to a clogged filter or a refrigerant problem
- Unusual noises or tripping the breaker
A unit that’s growing mold inside and being run anyway is worse than a hot room. Every time the fan runs, it moves air across that growth and into your breathing space. If anyone in the home has asthma, allergies, or a weakened immune system, treat visible mold as a reason to stop using the unit until it’s been dealt with.
Through-the-wall units (PTACs) and sleeve units
Many New York buildings, especially newer ones and some pre-war conversions, have through-the-wall units instead of window units. They sit in a permanent sleeve in the wall and often provide both heat and cooling.
You can do the visible parts yourself: wash the washable filter, wipe the front grille, vacuum dust from the intake, and clean around the outside of the unit. Don’t remove the unit from its sleeve or open sealed components. The coils, drain system, and refrigerant side are building equipment, typically maintained by the landlord or management. If yours smells musty or leaks, report it to your super rather than trying to fix it.
How often to clean
A rhythm that works for most apartments:
- Start of the season: the full clean above, before you run it the first time
- Every two to four weeks while it’s running: rinse the filter. In a dusty apartment, or with pets, do it more often.
- Mid-season check: look at the drain pan and the drain holes
- End of the season: clean it again before you store it or cover it. Our guide to fall and winter cleaning for NYC apartments covers closing it out for the cold months.
Doing the end-of-season clean makes spring easier, because nothing sits damp and untouched for six months.
Is the unit worth saving?
Cleaning fixes dirt. It doesn’t fix a unit that’s wrong for the room or past its life.
Size matters more than people think. A common rule of thumb is about 20 BTUs of cooling capacity per square foot of floor space, so a 300 square foot bedroom-and-living-room combination lands around 6,000 to 8,000 BTUs. An oversized unit cools the air quickly, shuts off, and never runs long enough to pull much moisture out. The room feels cold and clammy, the pan stays damp between cycles, and mold has an easy time. A unit that’s slightly small runs longer and dries the air better.
Age matters too. Units that have been in the same window for eight or ten years often have worn seals, weak fans, and corroded fins. If a thorough cleaning doesn’t bring back the airflow, or the compressor is loud and the room barely cools, replacement may cost less than another summer of high bills and repairs. A newer ENERGY STAR model uses noticeably less electricity.
Where the unit sits changes how it performs. Direct afternoon sun on the outdoor side heats the condenser and makes the unit work harder. A shaded window helps. So does keeping curtains or furniture from blocking the front vents, so cold air can move across the room instead of pooling next to the unit.
Storing it for winter
If you’d rather take the unit out, clean it first and let it dry fully. Store it upright, in a dry spot, covered so dust doesn’t settle on the coils. Laying it on its side can let oil from the compressor shift into places it shouldn’t. If the unit stays in the window, seal the gaps with an interior cover to stop drafts. Either way, a unit that’s put away clean and dry is far less likely to greet you with a musty smell next June.
Quick answers
Can I run the AC without a filter? No. The coils will clog with dust much faster, and the unit’s efficiency will drop.
Is it okay to use the AC in a room with visible mold on the unit? Not until it’s cleaned. If the growth is heavy or the smell persists, get it assessed.
Does an AC reduce humidity? Yes, it removes moisture as it cools, which helps keep indoor humidity in a healthy range. But a dirty or poorly drained unit can add to the problem, not solve it.
Should I cover the unit in winter? If it stays in the window, an interior cover cuts drafts. Cleaning it first matters, so you don’t seal in damp dust.
The short version
A window AC is a machine that breathes your air, so it deserves ten minutes of attention at the start of the season. Wash the filter, vacuum the coils, clean the drain pan, check the tilt, and look at the seal. Skip the bleach and the pressure washer. If you find heavy mold, rodent debris, or leaks, stop and get help. Everything else is a thirty-minute job that makes the first hot week a lot more pleasant.
Skip the Cleaning. Keep the Weekend.
Book your cleaning in 60 seconds — we handle the rest.
Book Now