When people picture a New York apartment floor, they picture oak strips that have been sanded and refinished for a century. That floor exists. It’s in a lot of pre-war buildings, and it forgives almost everything because it can always be sanded back to fresh wood.
It’s also not the floor in most apartments built or renovated in the last fifteen years. Walk through a new condo, a gut-renovated rental, or a landlord’s flip, and you’re standing on something else: wide-plank engineered hardwood, laminate, or luxury vinyl plank (LVP). They look like wood. Sometimes they look better than wood. And they follow completely different rules.
The difference matters because these floors fail in a different way. A solid oak floor that gets mopped too wet dulls and can be refinished. A laminate floor that gets mopped too wet swells at the seams, and no amount of cleaning brings it back. A vinyl plank can look spotless and still be slowly ruined by the rubber mat you put under the kitchen rug. This guide is about those three floors: how to tell which one you have, what each can and can’t take, what tools are worth using, and a routine that fits a small apartment.
(If your building is older and your floors are solid hardwood or stone, our guide to hardwood and stone floor care in NYC apartments is the one you want.)
First, figure out what you’re standing on
Many people don’t know which floor they have, and the answer decides how you clean it. A few quick checks.
Look at an edge. The cut edge of a floor shows up at a vent opening, the bottom of a door threshold, a transition strip between rooms, or under a baseboard that’s slightly pulled away. What you see tells you the material:
- Solid hardwood is wood all the way through, with a uniform grain from top to bottom.
- Engineered hardwood shows a thin layer of real wood on top of layered plywood, like a sandwich.
- Laminate shows a printed top layer over a brown or tan fiberboard core, often with a slightly crumbly, compressed look.
- Luxury vinyl plank is a flexible, plasticky material with a clean, uniform edge. You can often dent it with a fingernail.
Look at the pattern. Real wood never repeats exactly. Laminate and vinyl repeat the same grain pattern every few planks, sometimes noticeably. Scan across the room for identical knots or swirls.
Feel and listen. Laminate and many vinyl planks click together and float over the subfloor, so they can sound hollow underfoot. Engineered hardwood is often glued or nailed and feels more solid. Vinyl feels slightly warm and soft; laminate feels hard and slick.
Ask or check. In a rental, the landlord or management office usually knows. In a condo, the building’s documents or the original sales package may name the product. A sticker under a sink cabinet or in a closet sometimes still has the manufacturer’s label.
Once you know, you can follow the right rules. Here they are.
The shared rules: what all three floors want
Three habits apply to every floor on this list.
1. Grit is the enemy. Sand, salt, and grime from the street act like fine sandpaper under every footstep. New York produces plenty of it, and on a thin wear layer or a printed laminate surface, it dulls the finish over months. Vacuuming or dry dust mopping a couple of times a week does more for these floors than anything else. Turn off the vacuum’s rotating brush bar if it has one, because the bristles can leave fine swirl scratches. Use the hard floor setting.
2. Water is a problem, and the problem differs. Engineered hardwood and laminate both have cores that swell when wet. Vinyl doesn’t swell, but water can work under the seams of a floating floor and cause trouble underneath. The shared rule: no puddles, no soaking, no mopping with a dripping mop. A damp mop should leave the floor looking wet for a minute or two, then dry.
3. Neutral chemistry. A pH-neutral floor cleaner is the safe choice for engineered hardwood, laminate, and vinyl alike. Skip bleach, ammonia, and anything with strong solvents. Skip wax, oil soaps, and “shine” products, which leave a film that grabs dirt and clouds the finish.
Engineered hardwood
This is real wood on top of plywood. The wear layer, the part you can sand, varies from about 1 to 6 millimeters thick depending on the product. That layer determines how many times, if any, the floor can be refinished. Many engineered floors in rentals and new condos can be refinished once, and some can’t at all.
What it likes: dry dust mopping or vacuuming, a damp microfiber mop with a pH-neutral cleaner, felt pads on furniture, and mats at the door.
What it doesn’t: steam mops, which force hot moisture into the seams and can cloud the finish and void the warranty. Wax and oil soap. Standing water. Vinegar, which is an acid and slowly dulls polyurethane finishes. Abrasive pads.
A New York wrinkle: dry air. Steam radiators and forced air heat make apartments very dry in winter. Wood floors lose moisture, shrink, and can open small gaps. Most flooring makers recommend keeping indoor humidity roughly in the range of 30 to 50 percent. A small humidifier in the living room during winter protects the floor and is easier on your skin, too.
Scratches: fine scratches in the wear layer don’t have a satisfying DIY fix, so prevention matters more here than anywhere. For a deeper gouge, a wood-tone repair marker or filler stick from a hardware store can mask it, but the clean-and-polish approach that works on solid wood isn’t available.
Laminate
Laminate has a printed image layer under a hard, clear coating, bonded to a fiberboard core. It’s scratch resistant on the surface and cheap to produce, which is why landlords like it. Its weak point is the core. Fiberboard soaks up water like a sponge, swells, and doesn’t shrink back.
What it likes: vacuuming, dry or lightly damp microfiber mopping, immediate wiping of spills, felt pads, and low humidity swings.
What it doesn’t: any standing water, wet mops, steam, and wax or polish, which can leave a hazy buildup on the surface. A wet floor in a kitchen or bathroom can swell the edges of a plank in a single afternoon, and once the edge lifts, the only repair is replacing the plank.
Where the water comes from in a NYC apartment: the places where laminate fails first are the ones where moisture sits unnoticed. A dishwasher that leaks slightly, a plant saucer that overflows, a pet water bowl, a window AC unit that drips condensate, a radiator valve that weeps, and the wet spot by the front door where umbrellas sit all winter. Watch those spots. If you rent, report a recurring leak in writing so it’s on record before the floor swells.
Cleaning tip: use as little water as you can. A spray mop or a barely damp microfiber cloth, and dry the floor immediately behind you if there’s any visible moisture.
Luxury vinyl plank (LVP) and vinyl tile
Vinyl plank is a layered plastic product with a printed image and a clear wear layer. It’s often marketed as waterproof, and the planks themselves are. That doesn’t mean the floor is bulletproof.
What it likes: it’s the most forgiving of the three on water. You can mop it more freely than laminate or engineered wood, as long as you don’t flood it. It cleans well with a pH-neutral cleaner and a microfiber mop.
What it doesn’t:
- Rubber backing. Rubber-backed mats and rugs can react with vinyl and leave yellow or brown stains that don’t come out. This is called plasticizer migration, and it happens slowly under mats that sit in the same spot for months. Use rugs that are labeled safe for vinyl, or a breathable pad.
- Abrasive tools. Scouring pads, stiff brushes, and some “magic eraser” style sponges dull the clear layer. Once it’s scuffed, it stays scuffed.
- Steam and high heat. Steam can lift seams and distort planks.
- Harsh solvents. Nail polish remover, paint thinner, and strong degreasers can mark the surface.
- Heavy point loads. A heavy furniture leg can leave a permanent dent. Use wide, flat furniture cups, not narrow ones.
Seams: floating vinyl floors can allow water to seep under at the edges. Waterproof planks still need attention at doors and under sinks. Wipe spills quickly, and don’t let water sit near seams.
Which tool for which floor
The tool matters less than the method, but some tools are safer than others.
| Tool | Engineered hardwood | Laminate | LVP |
| Vacuum (brush bar off) | Yes | Yes | Yes |
| Dry microfiber dust mop | Yes | Yes | Yes |
| Damp (wrung out) microfiber mop | Yes | Yes, very damp only | Yes |
| Spray mop with washable pad | Yes, lightly | Yes, lightly | Yes |
| String or sponge bucket mop | Avoid | Avoid | OK if wrung well |
| Steam mop | No | No | No |
| Wax, oil soap, shine product | No | No | No |
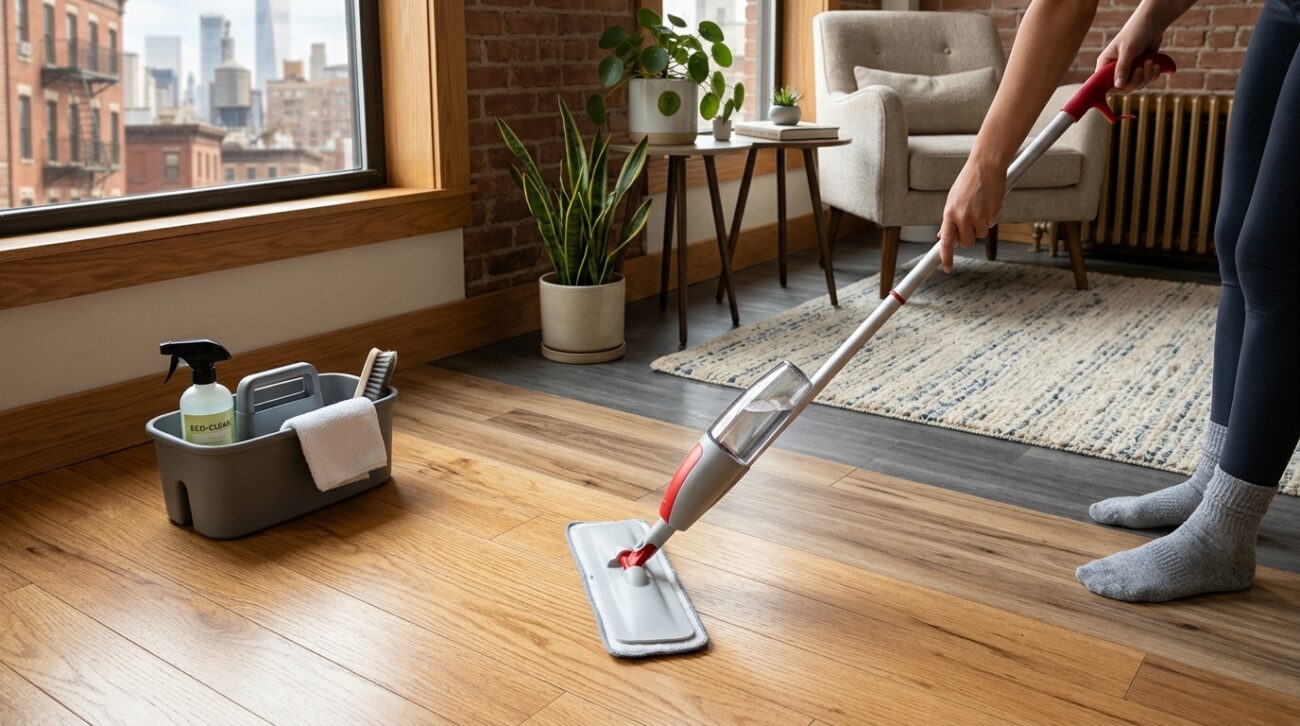
A few words on spray mops and disposable pad mops, because people ask. Used correctly, they’re a good fit for small apartments. You control how much moisture goes down, the flat head reaches under beds and radiators, and they store easily in a closet. The pre-moistened solution in some disposable systems can leave residue on certain floors, so many flooring manufacturers prefer a dry pad or a refillable bottle filled with a pH-neutral cleaner. A bucket mop is harder to control in a small kitchen, and it sends water everywhere you don’t want it.
The right order for a routine that works
Method matters more than the tool. This sequence works for any of these floors.
- Vacuum or dry mop the whole floor first, including along the baseboards and under furniture. A damp pad dragged through grit leaves streaks and scratches.
- Handle sticky spots by hand. A dried splash near the stove needs a damp cloth and a little pressure, not a bigger mop.
- Start at the far corner from the door and work backward, so you never step on the floor you’ve just finished.
- Use a lightly damp pad or mop, with a pH-neutral cleaner at the dilution on the label. Overdoing the cleaner leaves a film that attracts dirt.
- Work with the direction of the planks where you can.
- Change or rinse the pad often. A loaded pad pushes dirt around and causes streaks.
- Let it dry fully before walking on it in socks or replacing rugs.
How often: dry clean two or three times a week in the busiest areas, and damp clean weekly or every other week. Entryways and kitchens take the most wear and need the most attention.
Three trouble spots in a New York apartment
Floors don’t wear evenly. Three places take the worst of it.
The entry. Everything the street brings in lands here first: grit, salt in winter, rain, dog-walk residue. Put a coarse mat outside the door and a softer one inside, and shake them out regularly. Clean this strip more often than the rest of the floor, because a dirty entry mat just redistributes grit across the apartment.
The kitchen. Cooking splatter, dropped water, and dishwasher or fridge leaks all end up on the floor. Grease makes a floor tacky and holds dirt, so wipe it up the same day with a barely damp cloth and a drop of dish soap. Check under the sink and behind the fridge occasionally for slow moisture.
Under and around radiators. Steam radiators leak at valves, and the floor underneath can stay slightly damp for weeks without anyone noticing. A damp spot near a radiator on laminate or engineered wood should never be ignored. Also keep the floor right beside the radiator dry in winter, since condensation from window sills can drip down.
The small things that protect the finish
- A mat at the door, and a boot tray in winter. Road salt is hard on every finished floor.
- Felt pads under furniture legs, checked every few months. They wear flat and pick up grit.
- Wheels: office chairs and rolling carts scratch floors. Use soft casters or a chair mat made for your floor type.
- Lift, don’t drag. Slide a heavy bookshelf across a floating floor and you can shift planks or scratch the surface.
- Trim pet nails and put mats under water bowls.
- Wipe wet boots and umbrellas dry at the door.
- Control sun exposure. Strong afternoon sun fades some finishes over the years. A curtain or UV film helps if you get direct light.
What to do when something goes wrong
Cloudy or hazy patches. This is rarely a damaged floor. It’s usually product buildup from a shine product or too much cleaner. Clean with a barely damp cloth and plain water several times to lift the residue, then switch to a neutral cleaner used sparingly.
Scuffs. Most come off with a damp microfiber cloth and light pressure.
Sticky spots. Warm water on a cloth, held on the spot for a few seconds, then wiped.
A lifted edge on laminate or engineered wood. Dry the area immediately, remove any standing water, and photograph it. If it’s a rental, tell your landlord in writing right away. A swollen board rarely goes flat on its own.
Stains on vinyl from a rubber mat. Often permanent. Prevention is the cure.
A deep scratch. A repair kit made for your floor type (wax filler for laminate and vinyl, touch-up marker or filler for engineered wood) can hide it.
A note for renters
Most of these floors in rentals are installed by the landlord and aren’t covered by your own care instructions, so documenting condition matters. Take dated photos when you move in and before you move out. The most common deposit disputes over floors involve scratches, water damage at seams, and staining from mats or spills, all of which are easier to argue when you have a baseline. Our move-out cleaning checklist covers what landlords tend to inspect.
When to get help
Most of this is an easy routine. A few situations are worth outside help:
- Years of buildup, a hazy film, or the wrong products that have left a cloudy residue on the finish
- Water damage, swelling, or lifted seams
- A floor you’re not sure how to identify or what’s safe for it
- Weeks when you simply don’t have time to do it
Floors are one of the standard parts of a regular visit, along with the kitchen, bathrooms, and dusting. If you’re curious about how that breaks down, our guide to what’s included in a standard house cleaning lays it out.
The short version
Know which floor you have. Keep grit off it with a vacuum or dry mop. Use very little water, a neutral cleaner, and a microfiber mop. Skip steam, vinegar, wax, and anything abrasive. Protect against the things that actually do the damage in New York: salt, leaks, rubber mats, and furniture dragged across the surface. Do that, and the floor in your apartment will look the way it did the day it was installed.
Get Your Custom Cleaning Quote — Free
Every NYC apartment is different. Get pricing tailored to your space in minutes.
Get My Free Quote