
Here is something most New Yorkers don’t know: the water coming out of your tap is soft. Not “soft for a big city.” Genuinely soft. According to the NYC Department of Environmental Protection, water from the Catskill and Delaware systems, which supply most of the five boroughs, carries about 1 grain of hardness per gallon. The U.S. Geological Survey doesn’t start calling water “moderately hard” until roughly 3.5.
And yet. There’s a white crust around the base of your bathroom faucet. The shower door looks like it survived a sandstorm. The toilet has a faint ring that laughs at your brush.
So what’s going on? Several things, and most of them have nothing to do with the reservoirs upstate. This guide explains where the chalky, cloudy and sometimes orange stains in NYC apartments actually come from, how to remove them from each surface without damaging it, and how to keep them from coming back.
The Soft Water Paradox
Soft water still contains minerals. It just contains fewer of them. Every time a drop dries on a surface, it leaves its dissolved calcium and magnesium behind. One drop leaves nothing you can see. Thousands of drops landing on the same patch of glass over a few months leave a film you definitely can.
In a hard-water city like Phoenix or San Antonio, that film appears within weeks. In New York it takes longer, and that is exactly why it catches people off guard. The buildup happens slowly enough that nobody notices, until one morning the shower glass is no longer see-through and nobody can say when that happened.
A few conditions that are very typical of NYC apartments speed the process up.
Not every tap draws from the same source
Most of the city runs on Catskill and Delaware water, but the Croton system supplies a smaller share, and DEP puts its hardness at around 5 grains per gallon. That’s firmly in moderately hard territory. Depending on where you live and the time of year, some of what reaches your building may come from Croton. If you’re across the Hudson in Jersey City, your water comes from a different utility entirely, so the numbers above don’t apply. Every water supplier publishes an annual quality report, and hardness is almost always listed.
Heat pulls minerals out of water
Calcium carbonate becomes less soluble as water gets hotter, which means hot water drops its minerals faster than cold water does. That’s why the worst scale in any apartment shows up in the same places: showerheads, kettles, coffee makers and the hot side of the faucet. A long, hot New York shower in January is basically a small mineral deposit factory.
Bathrooms that never fully dry
A huge number of NYC bathrooms have no window, and the ones with exhaust fans often have fans that sound busy without moving much air. Water sits on glass and tile for hours instead of minutes. The longer a surface stays wet, the more time soap residue has to bond with minerals, and the more complete the evaporation when it finally happens.
The building adds its own ingredients
The city delivers clean water to your building. What happens between the street and your faucet is the building’s business. Older galvanized steel pipes corrode from the inside and release iron. Rooftop water tanks, still standard on thousands of buildings, can collect sediment between cleanings. Both show up in your apartment as orange or brown streaks rather than white crust. If you live in one of the city’s older buildings, this is one of several quirks worth knowing about, and our guide to cleaning a pre-war NYC apartment covers the rest.
First, Figure Out What You’re Actually Looking At
Not every white, cloudy or discolored patch in a bathroom is a hard water stain. Treating the wrong problem wastes time at best and damages surfaces at worst. Here’s how to tell the usual suspects apart.
White, chalky or crusty buildup. Classic mineral scale. It’s hard to the touch and often forms rings around faucet bases, drains and showerhead nozzles.
A cloudy gray film on glass that feels slightly waxy. This is usually soap scum mixed with minerals, and in New York it’s often the main problem rather than a side effect. Soap scum forms when the fatty acids in soap bind with calcium and magnesium. Even soft water supplies enough minerals to make it, and bar soap is the biggest contributor.
Orange, rust or brown streaks. Iron, typically from old pipes or tank sediment. It responds to acidic cleaners but tends to return until the source changes.
A pink or salmon-colored ring. Not minerals at all. That’s a bacterium called Serratia marcescens, which loves damp corners, shower curtains and toilet waterlines. Vinegar won’t solve it. A disinfecting bathroom cleaner and better ventilation will.
Cloudiness that nothing seems to touch. This may be etching, which is physical damage to the surface itself. More on that below.
A simple test settles most debates. Soak a paper towel in white vinegar, press it onto the spot and leave it for ten minutes. If the area looks clearer or the crust has softened, you’re dealing with a deposit and it can be removed. If nothing changes at all, you’re probably looking at etching.
What You Need
You don’t need specialty products for most of this. A short kit covers nearly every surface in a typical apartment:
- White distilled vinegar (the standard 5 percent kind)
- Citric acid powder, sold in the baking or canning aisle
- Plain dish soap
- Baking soda
- A spray bottle and a few microfiber cloths
- A non-scratch scrub pad and an old toothbrush
- Plastic bags and rubber bands
- A shower squeegee
- A pumice stone, for toilets only
- A pH-neutral stone cleaner, if you have marble or other natural stone
One safety rule that matters more than anything else in this article: never mix vinegar, citric acid or any acidic cleaner with bleach. The combination releases chlorine gas, and a small windowless bathroom is the worst possible place to find that out. Rinse surfaces well between products, keep the door open or the fan running, and wear gloves if you’ll be scrubbing for a while.
How to Remove Hard Water Stains, Surface by Surface
Every surface in your apartment reacts differently to acid and abrasion. The methods below are listed from the most forgiving materials to the least.
1. Glass shower doors and screens
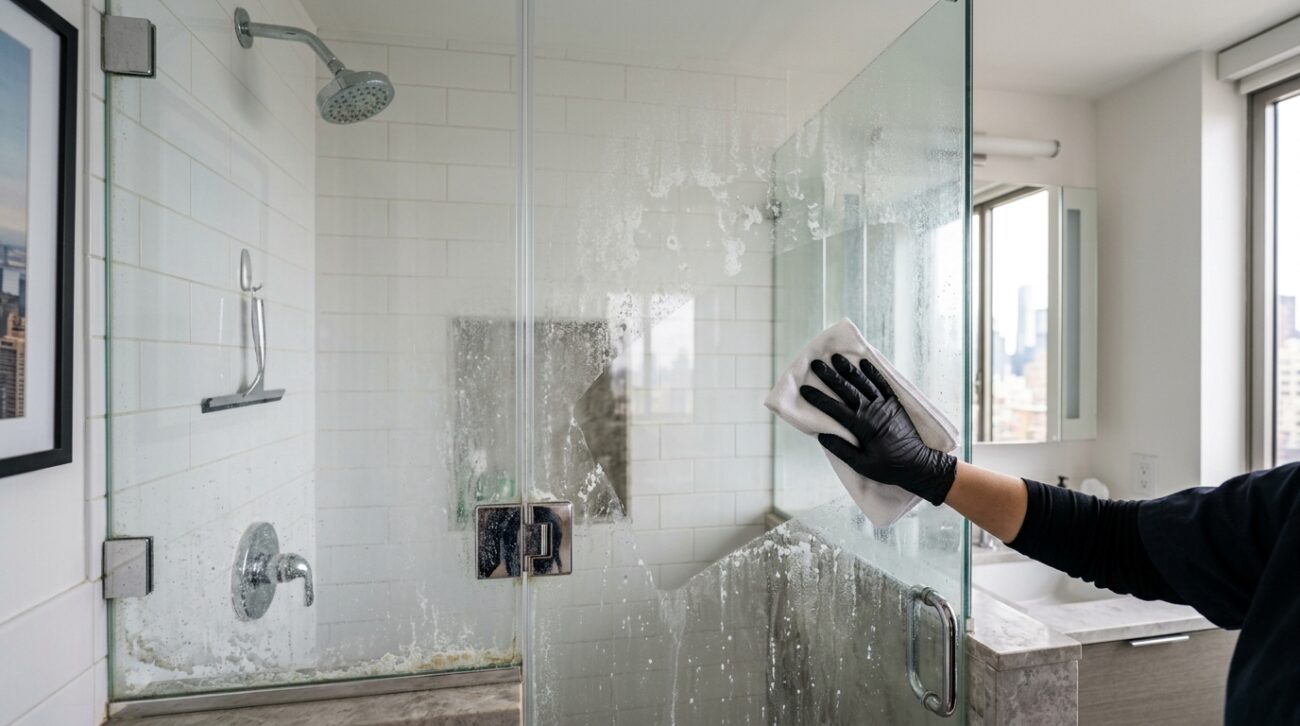
Warm a cup of white vinegar in the microwave for about 30 seconds, pour it into a spray bottle and add a teaspoon of dish soap. The vinegar dissolves the minerals and the soap cuts through the oily part of soap scum, so the two work better together than either one alone. Spray the glass generously, wait 15 to 30 minutes, then scrub with a non-scratch pad in small circles. Rinse with warm water and squeegee dry.
For heavier buildup, repeat the process rather than scrubbing harder. Two or three shorter rounds remove more than one aggressive session, and they’re much kinder to the glass.
You’ll see advice online to combine baking soda and vinegar into a fizzing paste. It looks dramatic, but the two neutralize each other, and what’s left is mostly salty water. If you want to use both, do it in sequence: scrub with a baking soda paste first as a gentle abrasive, rinse it off, then apply vinegar.
A note on razor blades. Some guides recommend scraping shower glass with a razor. Most professionals avoid it on shower doors, because tempered glass often has tiny particles fused to the surface during manufacturing, and a blade can drag them across the pane and leave scratches that never come out. Many newer doors also have factory coatings that a blade will strip. When in doubt, skip it.
2. Faucets and chrome fixtures
Soak a paper towel in vinegar and wrap it snugly around the faucet base and handles. Leave it for 20 to 30 minutes. Remove it, then work an old toothbrush into the seam where the faucet meets the sink or counter, which is where scale builds up thickest. Rinse and dry with a microfiber cloth. That last step matters, because a faucet left to air dry starts the whole cycle over again.
If water sprays sideways or the flow feels weak, the aerator at the tip of the spout is probably clogged. Most unscrew by hand or with a soft cloth wrapped around them. Soak the aerator in vinegar for an hour, scrub the screen with the toothbrush and screw it back on.
Before using any acid, check the finish. Plain polished chrome handles vinegar well. Matte black, brushed gold, oil-rubbed bronze and unlacquered brass are another story. Many manufacturers recommend nothing stronger than mild soap and water for these finishes, because acids can dull or discolor them. If you have one, look up the care instructions, dilute the vinegar with equal parts water, keep contact time short and test in a spot nobody will notice.
3. Showerheads
The bag method is one of the few cleaning tricks that genuinely works as advertised. Fill a plastic bag with enough vinegar to submerge the nozzles, pull it up around the showerhead and secure it with a rubber band. Leave it for about an hour. Plain chrome showerheads can soak overnight, but for specialty finishes, stick to the shorter time.
Remove the bag, run hot water for a minute to flush out loosened scale, and clear any stubborn nozzles with a toothpick. If your showerhead has flexible rubber nozzles, rubbing them with your thumb while the water runs will pop out most of the remaining deposits.
4. Toilet bowls
The ring at the waterline is scale that forms where water evaporates day after day. The trick is to get the cleaner onto the ring without it being diluted by the water in the bowl. Turn off the supply valve behind the toilet and flush to lower the water level. Pour in vinegar or a solution of a few tablespoons of citric acid dissolved in warm water, making sure it covers the ring. Let it sit for at least an hour, then scrub with a toilet brush. Turn the valve back on and flush.
For a ring that has been there longer than your lease, a wet pumice stone removes it on standard white porcelain. Keep both the stone and the surface wet the entire time, and use light pressure. Don’t use pumice on colored, matte or specialty-finish toilets.
While you’re there, check the small holes under the rim. When mineral deposits clog these jets, the toilet flushes weakly and streaks form down the sides of the bowl. A little vinegar applied under the rim with a toothbrush usually clears them.
5. Ceramic and porcelain tile
Glazed ceramic and porcelain tile tolerates vinegar well. Mix vinegar and water in equal parts, spray the tile, wait five to ten minutes, wipe with a microfiber cloth and rinse thoroughly with plain water.
The grout between the tiles is more sensitive. Standard cement-based grout is slowly weakened by repeated acid exposure, so a regular vinegar routine that keeps your tiles spotless can gradually erode the lines between them. Rinsing well after every acid application makes a real difference. If the grout itself looks gray, stained or crumbly, that’s a separate project with its own rules, and we’ve covered it in detail in our guide to cleaning tile grout in a NYC bathroom.
6. Stainless steel sinks
Stainless steel shows every water spot, especially in a small kitchen where the sink sees action all day. Sprinkle baking soda across the damp sink and scrub gently with a soft sponge, moving in the direction of the metal’s grain. Rinse, then wipe any remaining white spots with a cloth dampened in vinegar. Rinse again and dry completely with a microfiber cloth.
For a finishing touch, a few drops of mineral oil buffed into a dry sink leave a light protective layer that makes water bead up and roll off. It’s a small thing, but it noticeably slows the return of spots.
7. Kettles and coffee makers
Heat is the reason these appliances scale faster than anything else in your kitchen. A white or tan crust inside the kettle doesn’t make your tea dangerous, but it slows heating and gradually shortens the appliance’s life.
For an electric kettle, fill it about halfway with water, add one to two tablespoons of citric acid, bring it to a boil and let it sit for 20 minutes. Pour it out and rinse several times. Citric acid works faster than vinegar and doesn’t leave a smell behind.
For a drip coffee maker, run a brew cycle with a mixture of equal parts vinegar and water, then run two or three cycles with plain water to flush the taste out. Espresso machines and pod machines usually have specific descaling instructions, and following them helps keep the warranty valid.
8. Dishwashers and cloudy glassware
Cloudy glasses are one of the most misdiagnosed problems in New York kitchens. Try the vinegar test: soak a cloudy glass in white vinegar for five minutes. If it comes out clear, the cloudiness was a mineral film. Clean the dishwasher filter, add rinse aid, and run an empty cycle with a cup of vinegar standing upright on the top rack.
If the glass is still cloudy after the soak, the surface is etched, and here’s the twist: etching in dishwashers is often caused by too much detergent in soft water. With few minerals to react with, excess detergent attacks the glass itself. Since NYC water is soft, many people are using more detergent than their water needs. Try cutting back to half a dose and see if new glasses stay clear. Glasses that are already etched won’t recover, but you can protect the rest.
9. Natural stone: marble, travertine and limestone
This is the section where good intentions do the most damage. Marble, travertine and limestone are made largely of calcium carbonate, the same material as the scale you’re trying to remove. Anything that dissolves scale also dissolves the stone. Vinegar, citric acid, lemon juice and most “bathroom descaler” products will etch a dull spot into polished marble in minutes, and that spot doesn’t come out with more cleaning.
Plenty of NYC bathrooms have marble vanities, thresholds or shower walls, especially in renovated pre-war apartments and newer condos. On these surfaces, use only a pH-neutral cleaner made for stone, a soft cloth and patience. Light water spots can often be lifted with a stone-safe cleaner and a plastic scraper held flat. Heavy mineral buildup on natural stone is a job for a stone restoration specialist, who can hone and repolish the surface.
Are Hard Water Stains Permanent?
Most aren’t. Mineral deposits sit on top of a surface, and with the right cleaner and enough contact time, they come off. Even years of buildup usually yields to repeated treatments.
Etching is different. It’s damage to the surface itself, not something sitting on it. It happens in three main ways:
- Mineral deposits left on glass for a long time, especially in hot, humid conditions, gradually bond with and pit the glass.
- Acidic cleaners applied to natural stone dissolve the top layer of the stone.
- Excess dishwasher detergent in soft water slowly erodes glassware.
Etched glass looks cloudy whether it’s wet or dry, and it feels slightly rough when you run a fingernail across it. Light etching can sometimes be improved with a glass polishing compound and a lot of elbow grease. Deep etching on a shower door usually means professional glass restoration or replacement. Etched marble can be restored by a specialist who hones the damaged layer away.
The practical takeaway: the earlier you deal with buildup, the less likely it is to turn into damage. A shower door that gets a quick weekly treatment will look new for years. One that gets ignored until move-out day may not.
Keeping Hard Water Stains From Coming Back
Removing buildup is satisfying. Not having to do it again is better. None of the habits below take more than a minute, and together they slow the return of stains dramatically.
Squeegee the glass after every shower. This single habit prevents more buildup than any cleaning product. It takes about 15 seconds, and if you hang the squeegee inside the shower, you’ll actually use it.
Dry the faucet after use. Keep a small microfiber cloth near the sink and give the base of the faucet a quick wipe at night. Water that isn’t allowed to evaporate can’t leave minerals behind.
Run the exhaust fan longer. Turn it on when you start your shower and leave it running for 20 to 30 minutes after. If your fan barely works, it’s worth asking your landlord or super to check it, because weak ventilation causes bigger problems than water spots, including the mildew that thrives in the same conditions.
Switch from bar soap to liquid body wash. Bar soap is a major source of soap scum. Many people see a noticeable difference in how quickly shower glass clouds up after switching.
Do a light weekly treatment. A quick mist of diluted vinegar on glass and chrome, followed by a rinse and a wipe, stops deposits before they build up. Skip this on natural stone and specialty fixture finishes.
Try a water-repellent glass coating. Hydrophobic glass treatments, sold at hardware stores and auto shops, make water bead up and slide off. Reapplying every few months keeps shower glass clear with very little effort.
Descale on a schedule. Once a month for the kettle and every one to three months for the coffee maker keeps scale from ever getting thick.
As for water softeners: in most of NYC, they solve a problem you don’t really have, and renters usually can’t install one anyway. Shower filters mostly target chlorine rather than hardness, so they won’t do much for your glass. Your squeegee is a better investment.
When DIY Stops Being Worth It
Most mineral buildup in a typical apartment is a manageable weekend project. A few situations change the math.
Years of neglect. If you’ve just moved into an apartment where the previous tenant clearly never touched the shower door, you may need several rounds of treatment on every surface in the bathroom. That’s hours of work before you’ve even unpacked.
Natural stone and specialty finishes. The margin for error on marble, travertine, matte black fixtures and unlacquered brass is small. One wrong product can do permanent damage that costs far more to fix than the cleaning itself.
Move-out. Landlords notice crusty faucets and cloudy shower glass, and these are among the most common items flagged at a final walkthrough.
Time. Descaling every fixture, glass surface and tile wall in a bathroom and kitchen is slow work when you do it properly, with the right dwell times and a thorough rinse between products. It’s also standard work in a professional deep cleaning, where cleaners work with surface-specific products and know which materials can handle acid and which can’t.
Whichever route you choose, the approach is the same: identify what you’re dealing with, match the product to the surface, give it time to work, and dry everything when you’re done. New York’s water is doing you a favor by being soft. With a few small habits, your fixtures can keep it that way.
Skip the Cleaning. Keep the Weekend.
Book your cleaning in 60 seconds — we handle the rest.
Book Now