New York kitchens are small, and in a small kitchen, grease travels. There’s no separate breakfast nook for it to settle on, no big window to carry cooking smoke outside, and often no range hood that actually vents anywhere. Everything you cook ends up, in some microscopic amount, on everything else: the cabinet fronts, the top of the refrigerator, the light fixture, the backsplash grout and the one decorative plant you swore you’d keep alive.
Daily wiping keeps a kitchen looking fine. It doesn’t touch the oven interior, the range hood filter, the condenser coils under the fridge or the dishwasher filter that most people don’t know exists. Those are the jobs of a deep clean, and they’re the reason a kitchen that looks clean can still smell a little off.
This guide walks through deep cleaning a typical NYC apartment kitchen appliance by appliance, with the methods that actually work, the mistakes that damage expensive equipment and the order that makes the whole job faster.
Why Small Kitchens Get Grimy Faster
A few features of city apartments make kitchen grime build up faster than it would in a larger home.
Recirculating range hoods. In most NYC apartment buildings, the hood above the stove doesn’t vent outside. It pulls air through a filter and blows it right back into the kitchen. That filter catches some grease, but a lot of it still floats around the room and settles on nearby surfaces.
No window, or a window you can’t open in winter. Without cross-ventilation, cooking vapor lingers. It condenses on cool surfaces and leaves a sticky film behind.
Everything is close to the stove. In a galley kitchen, the refrigerator might sit two feet from the burners. The microwave is often mounted directly above them. Cabinets are within splatter range. There’s simply less distance for grease to disperse.
Constant use. In a small apartment, the kitchen is often part of the living space. It gets used for coffee, snacks, late-night reheating and cooking, sometimes all within a few hours.
The result is a layer of what cleaners call “kitchen film”: a combination of grease, dust and cooking residue that turns sticky and slightly tacky. It’s why the top of the refrigerator feels strange when you finally reach up there.
What You’ll Need
A kitchen deep clean doesn’t require a cabinet full of specialty products. A short list handles almost everything:
- Dish soap, the grease-cutting kind
- Baking soda
- White vinegar
- A spray bottle
- Microfiber cloths and a few sponges
- A non-scratch scrub pad
- A plastic scraper or old plastic card
- A small brush or old toothbrush
- A straightened paperclip or a sewing pin
- Rubber gloves
- A vacuum with a crevice tool and brush attachment
A commercial oven cleaner and a glass cooktop cleaner are useful for specific jobs, which we’ll get to. The one thing you should never do is combine products. Mixing cleaners, especially anything containing bleach with anything acidic or with ammonia, can release toxic fumes. In a small kitchen without much airflow, that risk is real.
Work in the Right Order
The biggest time saver in a kitchen deep clean is starting the slowest jobs first. Several of the steps below involve letting a cleaner sit for hours. If you do those first, the waiting happens while you’re working on everything else.
- Start the oven cleaning, because it needs the longest contact time.
- Put the stove grates, burner caps and range hood filter in to soak.
- Empty and clean the refrigerator while those work.
- Move on to the microwave, dishwasher and small appliances.
- Clean the cabinets and backsplash, working from the top down.
- Finish the oven, grates and hood filter.
- Clean the sink last, then the floor.
Top to bottom and cleanest to dirtiest is the general rule. Anything you knock loose from the upper cabinets will land on the counters and floor, so those come at the end.
The Oven
The oven is the job everyone puts off, so let’s start there.
The baking soda method
For moderate buildup, the most reliable DIY approach uses nothing more than baking soda and water. It’s slow, but it’s gentle on the oven’s enamel and doesn’t produce harsh fumes, which matters in a small apartment.
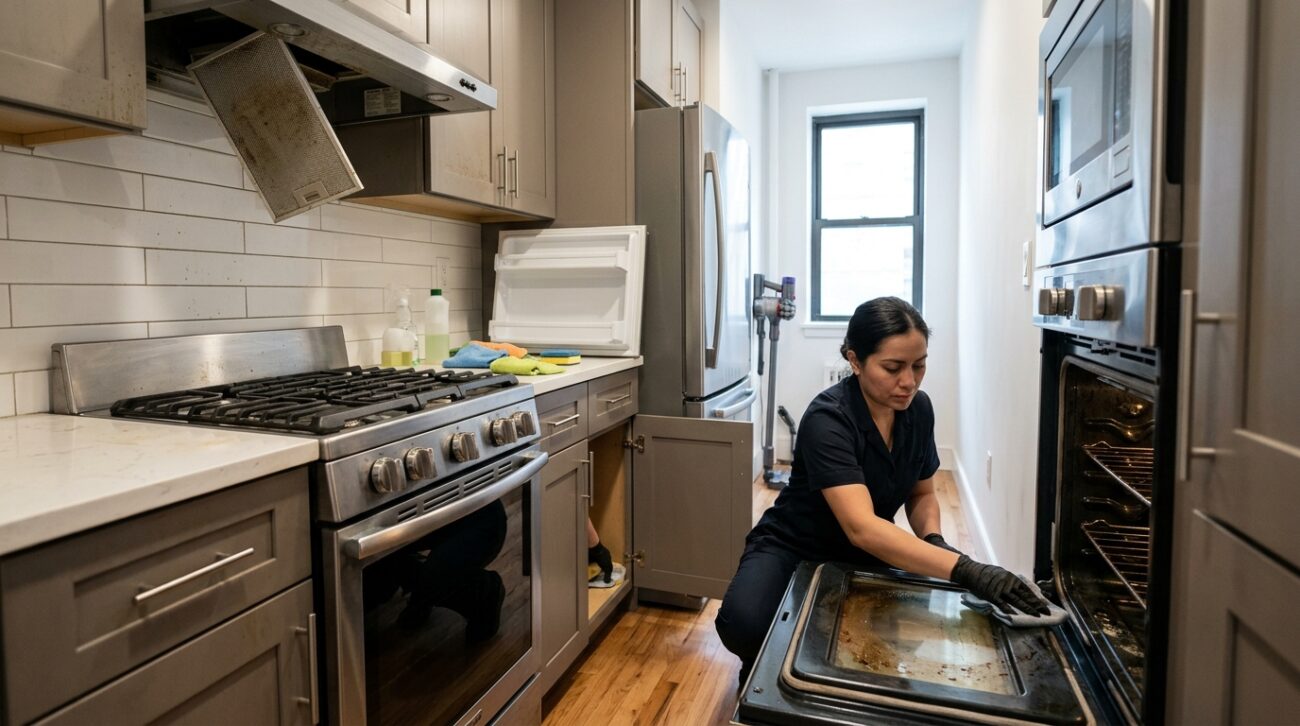
Remove the racks and anything stored inside. Mix about half a cup of baking soda with a few tablespoons of water to form a spreadable paste. Wearing gloves, coat the interior surfaces, avoiding the heating elements and any gas ports. Brown spots will turn darker as the paste works. Leave it overnight, or for at least 12 hours.
The next day, wipe out as much as you can with a damp cloth, using a plastic scraper for stubborn areas. Then spray a little vinegar over any remaining white residue. It will foam slightly as it reacts with the leftover baking soda, which helps lift it. Wipe clean with a damp cloth and repeat until no white residue remains.
This method handles normal buildup well. For an oven that hasn’t been cleaned in years, expect to repeat it at least once.
Commercial oven cleaners
Commercial oven cleaners work faster because they’re strongly alkaline, and they’re effective on baked-on grease. They’re also caustic. Wear gloves, protect your eyes, open whatever window you have and follow the label exactly. Don’t use them on self-cleaning ovens unless the oven’s manual says it’s safe, because many manufacturers warn that harsh cleaners can damage the special interior coating.
A word about the self-cleaning cycle
The self-clean setting heats the oven to extremely high temperatures, often in the range of 800 degrees or more, to burn food residue to ash. It works, but it has some downsides in a small apartment. The cycle typically produces smoke and strong odors for several hours, and the fumes are known to be dangerous for pet birds. Very high heat can also strain oven components, and repair technicians report that failed parts after a self-clean cycle are a fairly common service call.
If you use it, remove the racks first (the heat can discolor them), wipe out loose debris, open a window, run the hood, and stay home while it runs. Many newer ovens also have a steam-clean setting, which uses much lower heat and a bit of water to soften light messes. It’s a good option for regular maintenance, though it won’t handle heavy buildup.
Racks and oven door
Oven racks are too big for most NYC sinks. The bathtub works well: lay an old towel on the bottom to protect the finish, put the racks on it, and fill with enough hot water to cover them. Add a generous amount of dish soap or a couple of dishwasher tablets and leave them overnight. In the morning, scrub with a non-scratch pad, rinse and dry.
For the oven door, clean the inside glass with the baking soda paste, then wipe with a damp cloth. Many oven doors have a gap between the inner and outer glass, and drips of cleaning solution can get trapped in there, so apply cleaner to a cloth instead of spraying the door directly.
The Stovetop
Gas burners
Lift off the grates and burner caps and soak them in hot, soapy water in the sink. Wipe the stovetop underneath with a soapy cloth, using the plastic scraper for anything baked on.
If a burner lights unevenly or has a weak, yellow flame, the small ports around the burner head may be clogged. Clear them gently with a straightened paperclip or a pin. Toothpicks tend to snap off inside the ports. Make sure everything is completely dry before you reassemble the burners and relight them.
Glass and ceramic cooktops
Smooth-top electric and induction cooktops scratch easily. Skip scrubbing pads and abrasive powders. Use a cleaner made for glass cooktops and a soft cloth. For burnt-on spots, a razor scraper designed for cooktops, held flat at a low angle, removes residue without scratching the surface. Make sure the cooktop is completely cool before you start.
Coil burners
On older electric stoves, the coils usually unplug. Wipe them with a damp cloth once they’re cool, but never soak them. Wash the drip pans underneath in hot soapy water. If they’re permanently stained, replacement drip pans are inexpensive and instantly improve the look of an old stove.
The Range Hood
The range hood is probably the dirtiest thing in your kitchen that you never look at.
Metal mesh filters. Most hoods have one or two metal filters that pop out from underneath. Fill the sink with the hottest tap water you have, add a generous squirt of dish soap and a few tablespoons of baking soda, and let the filters soak for 15 to 20 minutes. Scrub gently with a brush, rinse and let dry completely before putting them back. Aluminum filters can darken in the dishwasher, so hand washing is safer unless the manufacturer says otherwise.
Charcoal filters. If your hood recirculates air rather than venting it outside, it probably also has a charcoal filter behind the metal one. These can’t be washed. Most manufacturers recommend replacing them every few months, depending on how much you cook. If your kitchen smells of cooking long after dinner, a spent charcoal filter is often the reason.
The hood itself. Wipe the outside and underside of the hood with warm soapy water. Grease builds up in the corners and around the light, so give those spots extra attention. For stainless steel, dry and buff along the grain afterward.
The Refrigerator
A refrigerator deep clean is best done right before a grocery trip, when there’s the least inside it.
Empty it completely. Take everything out and use the opportunity to get rid of expired items. Put perishables in a cooler or in a bag with ice packs while you work.
Wash shelves and drawers. Remove every shelf and drawer that comes out and wash them in the sink with warm soapy water. Let glass shelves come to room temperature before putting them in hot water, because cold glass can crack from a sudden temperature change.
Clean the interior. Wipe the inside with a solution of warm water and a couple of tablespoons of baking soda. It cleans well and doesn’t leave a chemical smell near your food. Pay attention to the back corners, where spills collect, and the channel at the back of the fridge that drains condensation.
Don’t forget the door gaskets. The rubber seals around the door trap crumbs and spills in their folds. Clean them with warm soapy water and a toothbrush, then dry. A seal that’s dirty or sticky doesn’t close properly, which makes the refrigerator work harder.
Vacuum the condenser coils. The coils are usually behind a grille at the bottom front of the refrigerator or on the back. They collect dust, pet hair and kitchen grease, which makes the compressor run longer and harder. Vacuum them with a brush attachment. This is one of the most overlooked jobs in any kitchen and one of the most useful.
Deal with the freezer. If there’s frost buildup, defrost the freezer fully. For stale smells, an open box of baking soda on a shelf does a good job of absorbing odors after cleaning.
The Microwave
The microwave is the easiest appliance to clean and the one people most often let get out of hand.
Fill a microwave-safe bowl with a cup of water and a few slices of lemon or a tablespoon of vinegar. Heat it on high for three to five minutes, until the window steams up, then leave the door closed for another few minutes. The steam loosens dried splatters so they wipe off easily. Remove the turntable and wash it in the sink.
If your microwave is mounted over the stove, it also has a grease filter on the bottom, much like a range hood. Take it out and clean it the same way.
The Dishwasher
It sounds strange to clean the machine that cleans everything else, but dishwashers collect food particles, grease and mineral film over time.
Clean the filter. Most modern dishwashers have a filter at the bottom of the tub that twists out. Rinse it under hot water and scrub off trapped food with a soft brush. If your dishes have been coming out with a gritty film or a faint smell, a clogged filter is the usual cause.
Check the spray arms. Remove them if they come off easily and rinse out the holes. Food particles can block the holes, which reduces water pressure and leaves dishes dirty.
Wipe the door and seals. The edges of the door and the rubber gaskets collect grime that the wash cycle never reaches.
Run a cleaning cycle. Run an empty hot cycle with a dishwasher cleaner, or with a cup of white vinegar standing upright on the top rack. Doing this once a month keeps buildup under control.
Small Appliances
Toaster and toaster oven. Unplug them, empty the crumb tray and shake out loose crumbs over the sink. Crumbs in the bottom of a toaster are a genuine fire risk as well as an invitation to pests.
Coffee maker. Wash the carafe and filter basket in warm soapy water. Descale the machine every month or two, depending on how much you use it.
Blender and food processor. Take apart everything that comes apart. Food gets trapped under the blades and in the gaskets. A soft brush and warm soapy water will handle it.
Air fryer. The basket and tray collect a lot of grease. Soak them in hot soapy water and wipe the inside of the unit with a damp cloth once it’s cool, avoiding the heating element.
If Your Washer Is in the Kitchen
In-unit laundry is becoming more common in NYC apartments, and in many layouts the washer sits in or next to the kitchen. Front-loading washers in particular need regular attention.
Wipe the rubber gasket around the door, pulling back the folds, where water, hair and detergent residue collect and mildew can form. Pull out the detergent drawer and rinse it. Run an empty hot cleaning cycle once a month, and leave the door and drawer slightly open between loads so everything can dry.
Cabinets, Backsplash and Hidden Surfaces
Once the appliances are done, move on to the surfaces around them.
Cabinet fronts. Kitchen grease leaves a sticky film on cabinet doors, especially the ones closest to the stove. Warm water with a little dish soap, applied with a soft cloth, removes it. On wood cabinets, wring the cloth out well so you’re not soaking the wood, then dry immediately.
Inside cabinets. While you’re at it, empty one cabinet at a time, vacuum out crumbs and wipe the shelves. The cabinet under the sink deserves a closer look for leaks, moisture and signs of pests.
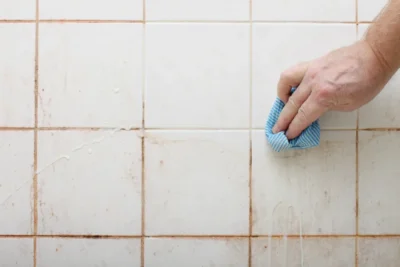
The backsplash. Tile behind the stove collects grease spatter. Warm soapy water handles most of it, and a baking soda paste with a toothbrush works well on grout lines.
Tops of cabinets and the refrigerator. Grease and dust combine up here into a layer that’s surprisingly hard to remove. Spray with warm soapy water, let it sit a minute, then wipe. A trick many pros use for the future: once it’s clean, lay a sheet of wax paper or butcher paper on top of the cabinets or fridge. When it gets greasy, throw it out and replace it.
Light fixtures and switches. Kitchen lights collect the same film as everything else. Turn the power off, let bulbs cool and wipe fixtures with a damp cloth.
The Sink and Floor
Save the sink for last, since you’ll have been rinsing things in it all day.
Scrub the basin with baking soda and a soft sponge, working along the grain if it’s stainless steel. Clean around the faucet base and the drain, where grime collects. For the drain, pour in some baking soda and follow it with very hot water. Never pour grease down the drain. In older NYC buildings with narrow, aging pipes, grease is one of the main causes of clogs, for you and the neighbors below.
Finally, the floor. Vacuum or sweep thoroughly, paying attention to the gaps beside the refrigerator and stove, where crumbs collect. Then mop with a cleaner suited to your floor type. If you can safely slide the stove or refrigerator out, the floor underneath is worth doing once or twice a year. What you’ll find under there explains a lot about kitchen pests.
Keeping It That Way
Once the kitchen is deep cleaned, a few regular habits keep it from sliding back.
- Wipe the stovetop and counters after each time you cook, while spills are still fresh.
- Run the range hood whenever you cook, and for a few minutes afterward.
- Clean out the refrigerator weekly, ideally before you go shopping.
- Clean the dishwasher filter and hood filter once a month.
- Do the oven and the tops of cabinets every few months, depending on how much you cook.
Crumbs and grease are also exactly what draws roaches and mice in city apartments, which makes regular kitchen upkeep one of the most effective forms of pest control. Our guide to keeping roaches and mice out of your NYC apartment covers the habits that matter most.
When It’s Worth Bringing in Help
A full kitchen deep clean done properly takes most of a day, even in a small apartment. The oven alone involves an overnight wait, and the rest is careful work that’s hard to rush.
Some situations make it worth handing over. A kitchen that hasn’t had a thorough clean in a year or more, heavy grease buildup on cabinets and hoods, a move in or out, or simply not wanting to spend a Saturday with your head in the oven are all good reasons. Kitchens are a central part of what’s covered in a professional deep cleaning, including the inside of appliances, degreasing cabinets and the high and low surfaces that regular cleaning skips. If you’re curious how a deep clean differs from a regular one across the whole apartment, our overview of what a deep clean includes lays it out.
Either way, the payoff is the same: a kitchen that doesn’t just look clean from the doorway, but feels clean when you open the oven, reach for something on top of the fridge or run your hand along a cabinet door.
Get Your Custom Cleaning Quote — Free
Every NYC apartment is different. Get pricing tailored to your space in minutes.
Get My Free Quote